Installing Your CD-ROM
AGENT- you must first install the CD-ROM supplied in your LEGO Spybotics box. This is essential, since it gives you access to:
- Full BUILDING INSTRUCTIONS for your Spybotics robot
- Complete Agent USER’S GUIDE to your robot’s features and functions
- 10 SECRET MISSIONS to download to your Spybotics robot
- CUSTOMIZE your CONTROLLER and ROBOT functions and abilities
- TROUBLESHOOT your Spybotics robot communications system
Using the Spybotics Controller
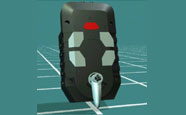 The controller gives agents full control of their robot while out on missions. The controller can be set to work in three different modes. The dial at the front of your controller allows you to select a mode.
REMOTE CONTROL MODE
Turn the dial to the radio tower symbol, furthest to the left. You can now control your Spybotics robot directly, as you would a remote control vehicle.
ACTION CONTROL MODE
Turn the dial to the action flash symbol, furthest to the right. This allows agents to use special abilities downloaded to your robot from the Spybotics software while you play a mission. These abilities vary in each mission, allowing you to gain energy, freeze opponents, upload secret data and much more.
LINK MODE
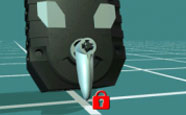
Turn the lever to the lock symbol, in the centre of the dial. Link mode ensures that your controller is linked to your robot with a secure communications channel. This is important when playing with more than one Spybotics robot in the same area. Linking to your robot means that you alone have full control over it when playing against other agents.
Linking the Controller to Your Spybotics Robot
When playing with other agents, it is very important that each Spybotics robot is linked to its controller on a secure communications channel. Otherwise, you may find that your opponents have control over your Spybot. There are 3 different secure communications channels you can link to, allowing up to 3 Spybotics robots to be independently controlled using RC mode.
Step 1
Set the controller to LINK MODE by turning the lever to the centre of the dial, pointing to the lock icon.
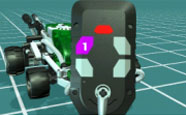 Step 2
Select one of the three channels by pressing either button 1, 2 (red), or 3 at the top of the controller.
Agent – make sure you choose a separate channel to your opponents.
 Step 3
Hold the controller in front of your Spybotics Robot (around 10-15cm), with the controller window facing the robot.
Now, press the link button (bottom right button with a key symbol). You should hear a short “bleep” sound, indicating that the link was successful.
Switch your controller back to RC mode now. Your secure communications link is complete.
Building Your Spybotics Robot
 Step 1
Click on the image of your Spybotics model from the S.M.A.R.T. Headquarters screen – this will now take you to the building instructions.
- Use the gadget icons to scroll through the building instructions.
- Perform the systems check, following the on-screen instructions.
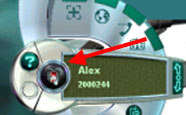 Step 3
Click on the SPYBOT STATUS button.
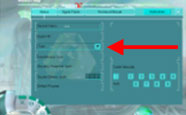 Step 4
Use the drop-down menu to identify your Spybot. This will ensure it functions correctly.
Loading Your Mission
 Step 1 – Go to the Mission Map
Click on the GLOBE icon found on the navigation gadget.
 Step 2 – Select a mission
To select a mission, roll the mouse over the highlighted missions on the world map.
As you roll over the icons, information at the bottom of the screen indicates the number of players and robots required for the mission.
Click on the desired mission icon to choose your mission.
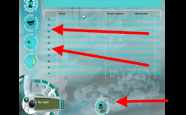 Step 3 – Understand your Mission
Click on the VIDEO CAMERA icon to view your mission briefing.
Then click on the MISSION SET UP icon to learn how to physically set up the mission at home.
Click on the DOWNLOAD icon to go to the download screen (go to Step 5).
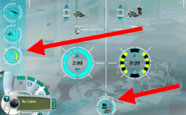 Step 4 – Adjust the Mission Settings (OPTIONAL)
Click on the MISSION SETTINGS icon to adjust the mission settings and make the mission easier or harder.
After completing the mission settings, then click on the DOWNLOAD icon – this will take you to the download screen.
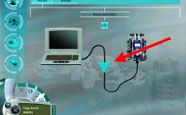 Step 5 – Download your mission
Make sure your Spybot is plugged in and turned on, then click the triangular download GO icon to download the mission to your Spybotics robot.
Starting Your Mission
Once you have downloaded a mission into your Spybot, you must now do the following to start running the mission:
Step 1
Press the GREY ‘run’ button on the top of your Spybot.
Note: If the mission requires you to calibrate the light settings on your Spybot, you must perform Step 1 underneath a light source, waiting until the yellow alert light comes on.
Step 2
Place your Spybot in the starting position, as described in the Mission Set Up.
Step 3
Start the mission by tapping the bumper on the front of your Spybot.
Spybotics Software FAQ
For more information about the Spybotics Software, please download this Spybotics Software FAQ in PDF format.

Hello again Pmichel,
First of all, you have a nice blog.
I obtained lots of useful information about the RCX 😉
Thanks Alberto!
I have obtained a Spybotics controller from the Snaptrax set, whose previous owner says the remote doesn’t work. Upon opening up the remote to put in batteries, I noticed that the green and red wires are disconnected from the circuit board. Does anyone have a schematic of the circuit board or, even easier, where these wires should be soldered to the circuit board? If you could, please email me. I will check back here for replies.
Thank you!!
Hi Doug,
Here you go:
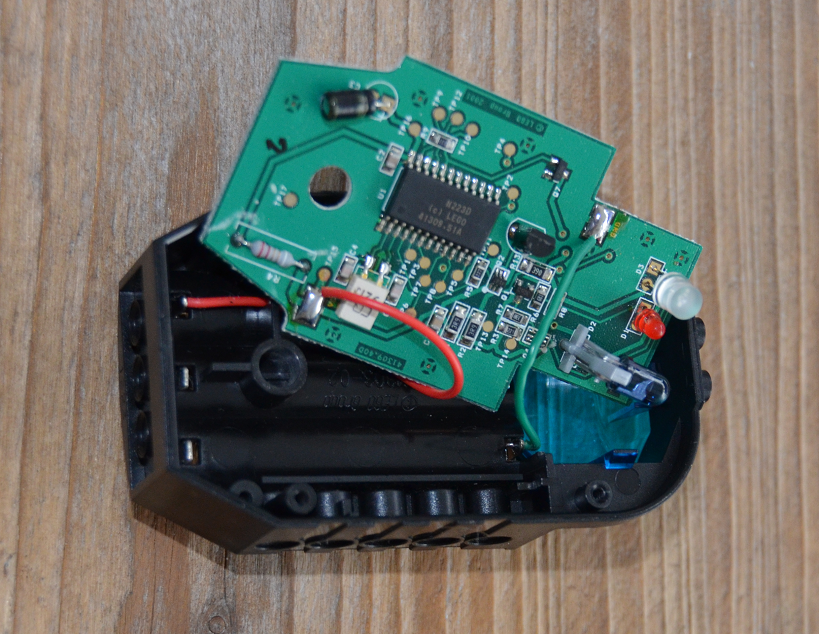
Hope you can get it working again! 🙂
Cheers,
Michiel
Michiel,
I’m glad I checked back here (after 4 years!) Thank you!!
Hi, I just found an old Snaptrax S45 in my house which I’ve never built before. Sadly the CD is missing. I can finish the set by looking for the instructions online. But I am not able to find anything about the software. Any ideas? I still have the cable and an old computer to run the software.
Thanks!
Check your email!
Michiel,
Would you be able to send me the software as well?
Many thanks!